
Creating the account and setting Vimel up
Initial setup runs from sign-up to the dashboard. Five numbered steps decide which modules the account uses, who the paying client is, which plan it pays for and which card it is charged on. At the end of them the subscription is active and the dashboard opens already saying what is still to be connected.
The person who walks this path is the one who will administer the account: sign-up creates the first user, and that user comes in as an administrator.
The product interface is in Portuguese, so the screenshots below are too. The field names are given here in both.
Sign-up
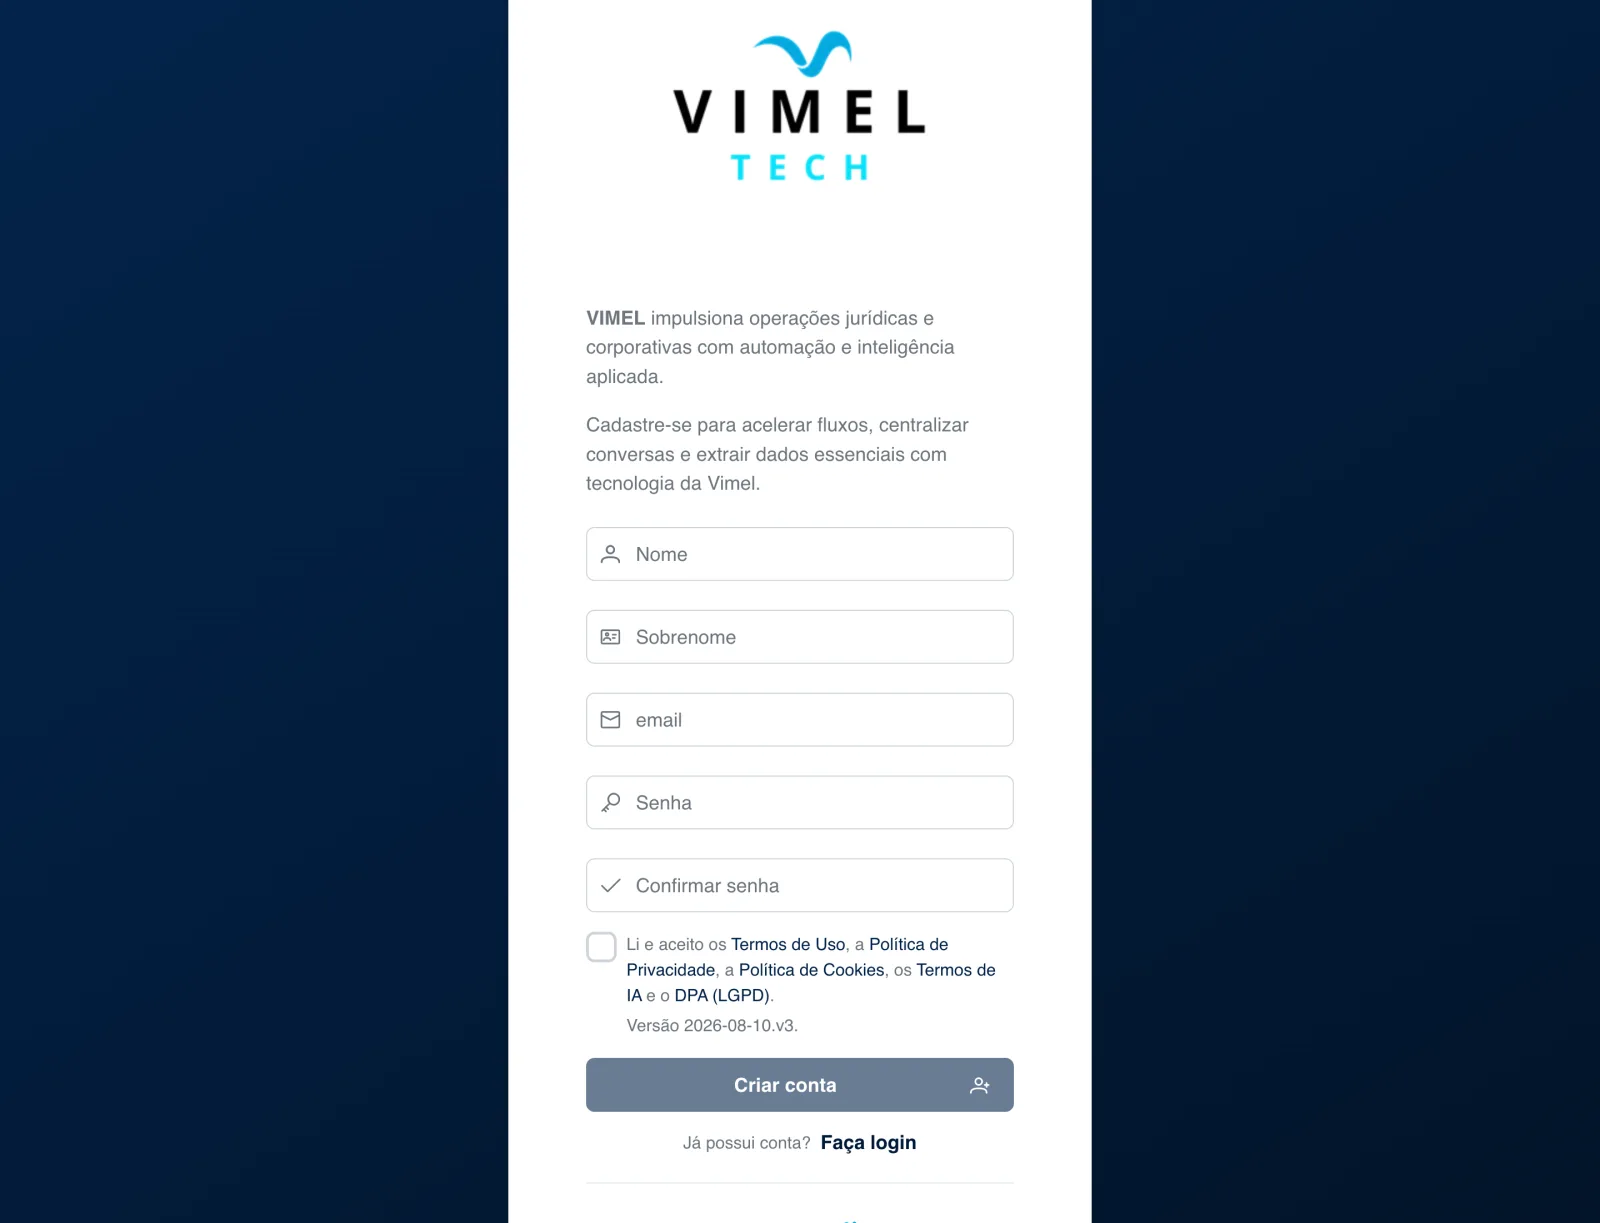
Sign-up asks for first name, last name, e-mail, password and the password confirmation. Acceptance covers the Terms of Use, the Privacy Policy, the Cookie Policy, the AI Terms and the DPA (LGPD), and the accepted version is recorded right under the text.
The e-mail entered here is the account login and is where the step 4 code is sent. Use an address you can open straight away.
Once the account is created, Vimel goes directly into setup — there is no separate invitation or waiting step.
Step 1 — Modules (Módulos)
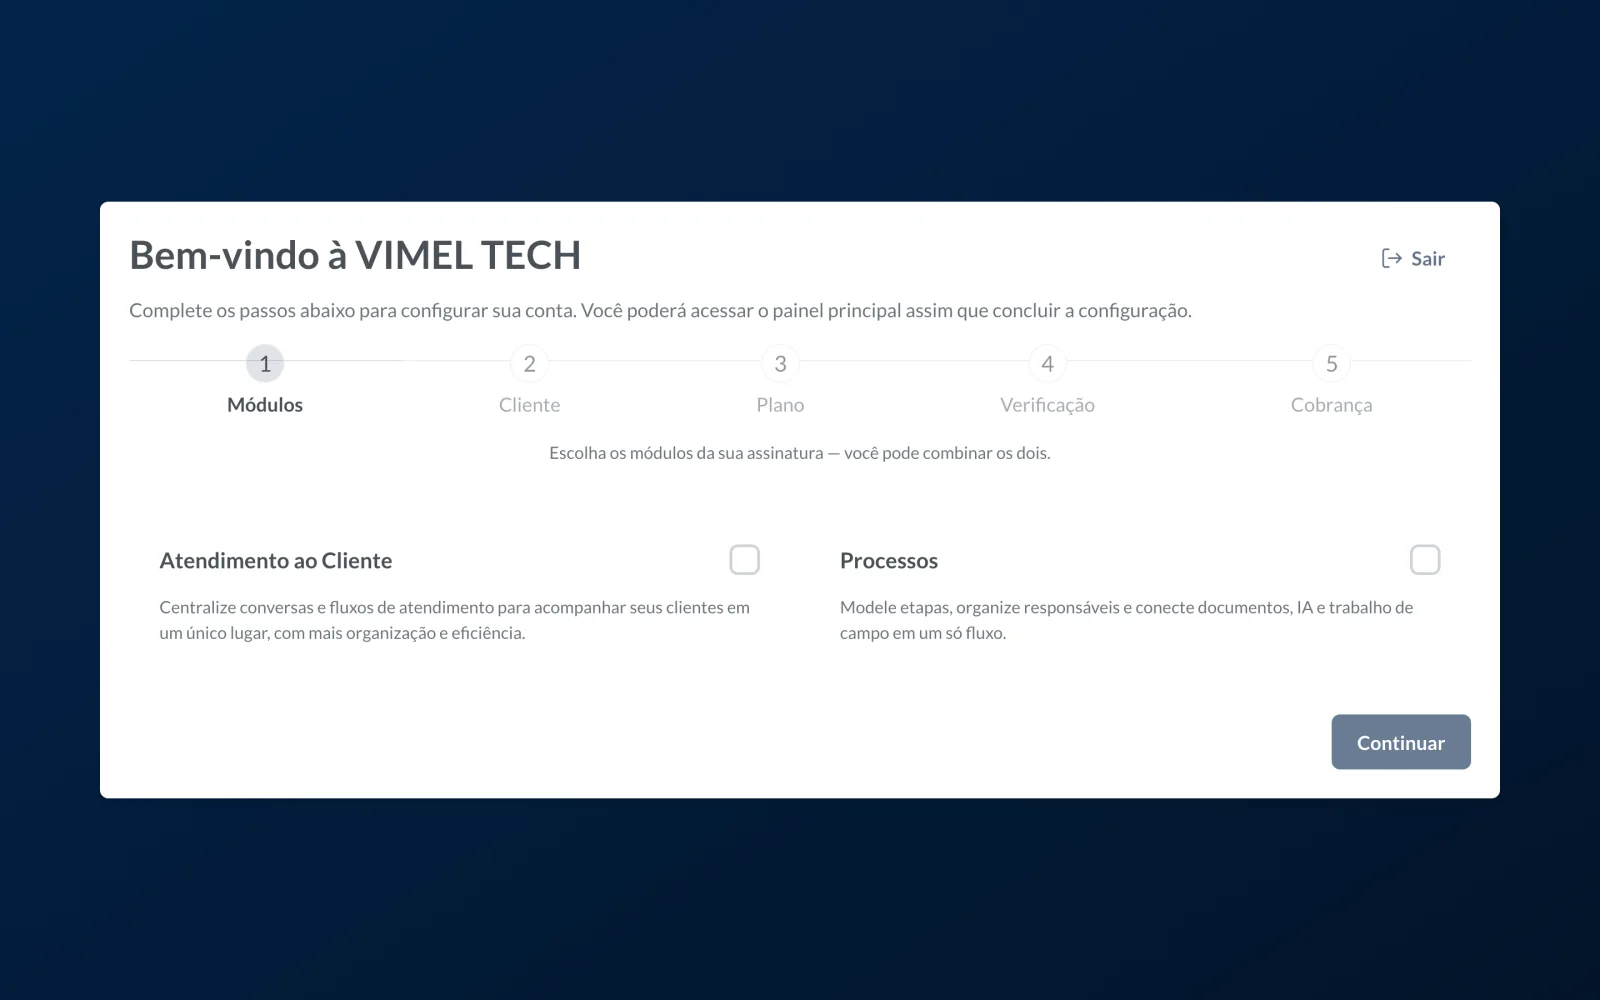
The modules are the product's two fronts, and the screen says the two can be combined:
- Atendimento ao Cliente (Customer Service) centralises conversations and service flows in one place.
- Processos (Processes) models stages, organises owners and connects documents, AI and field work in a single flow.
The choice here is what decides the plans offered in step 3 and what appears in the menu afterwards.
Step 2 — Client (Cliente)
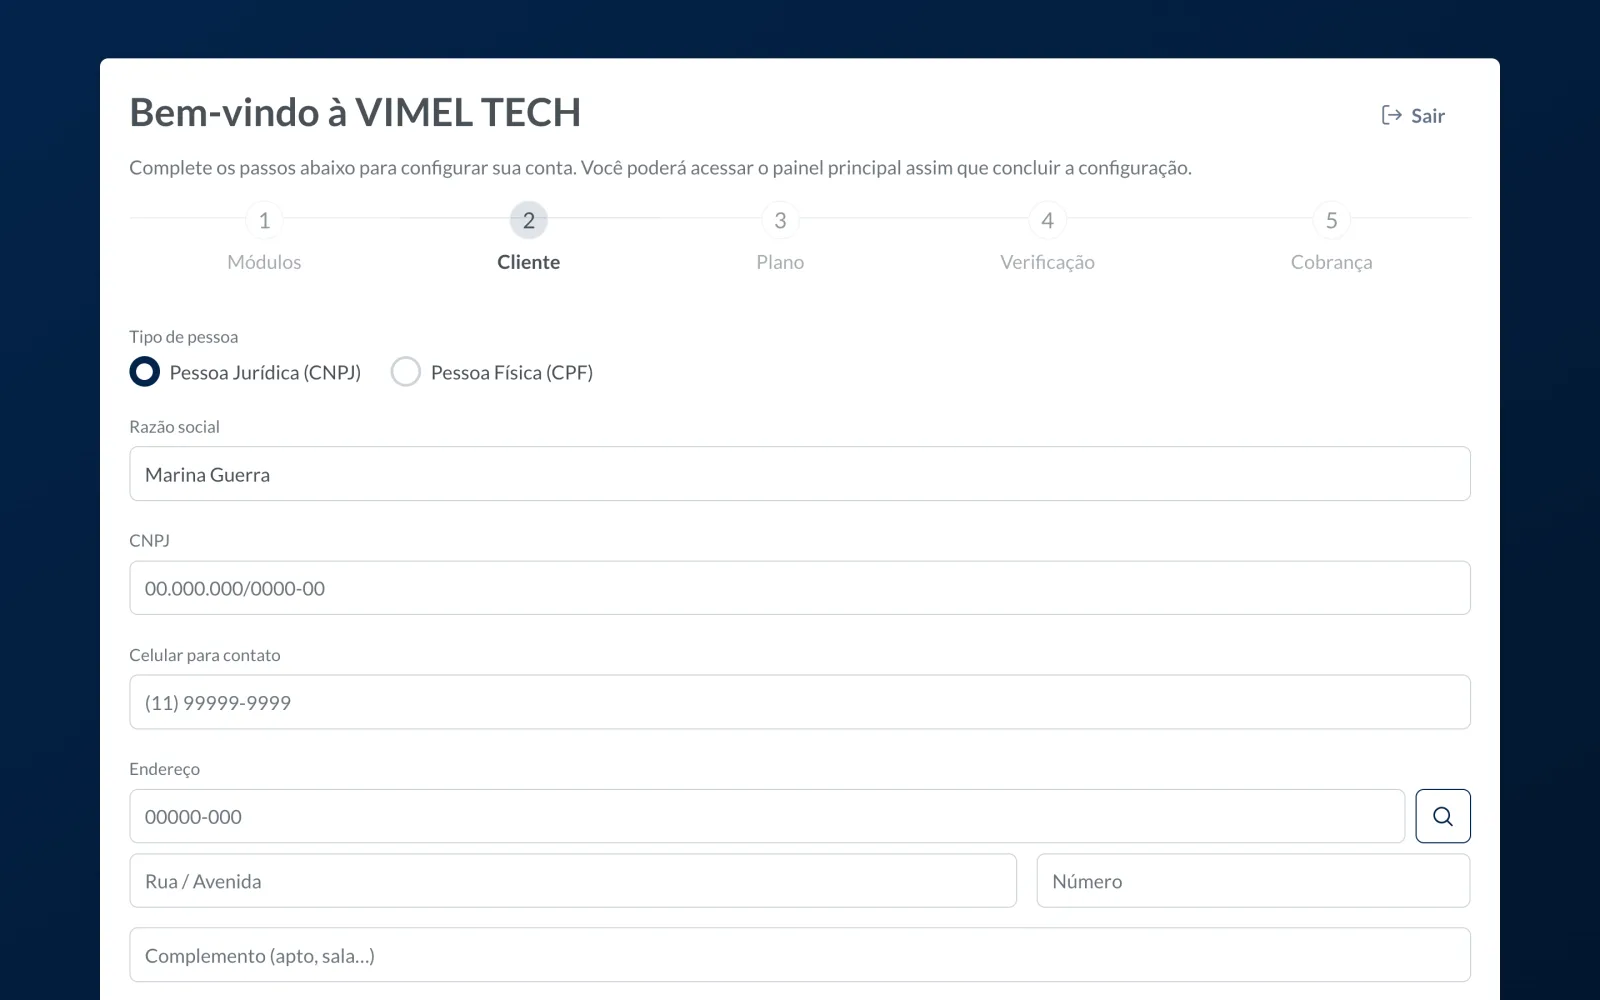
This step describes who is paying, not who is using. Start with the entity type — a company, with a CNPJ, or an individual, with a CPF — because that is what swaps the fields below it.
The company name (razão social) arrives pre-filled with the name of whoever signed up. If a company is paying, replace it with the company's name: this is the text that appears on the billing summary and on documents.
The address starts from the postcode, with a lookup button beside it, and continues into street, number and complement.
Step 3 — Plan (Plano)
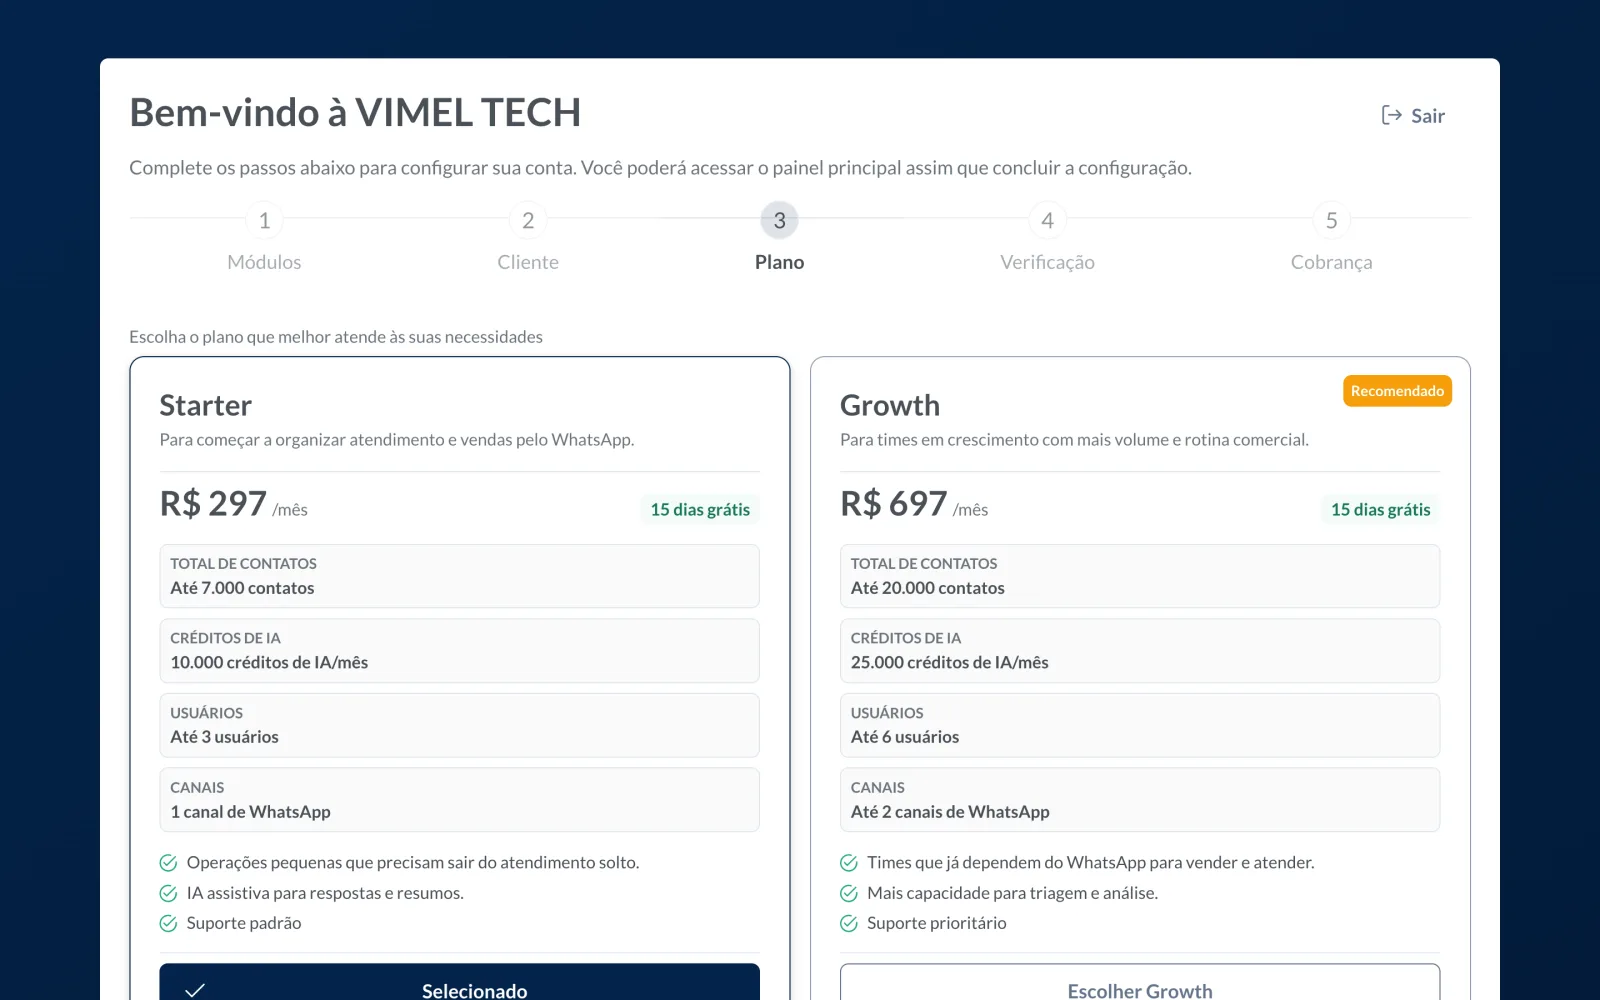
The plans sit side by side, and they all compare the same four measures: total contacts, AI credits per month, number of users and number of WhatsApp channels. One of them is marked as recommended.
Those four measures are what separates one plan from another, and it is worth choosing on whichever binds first in your operation — the WhatsApp channel ceiling usually binds before the contact ceiling.
Every plan shows its free trial period next to the price. The trial starts when the subscription is confirmed in step 5, not now.
Step 4 — Verification (Verificação)
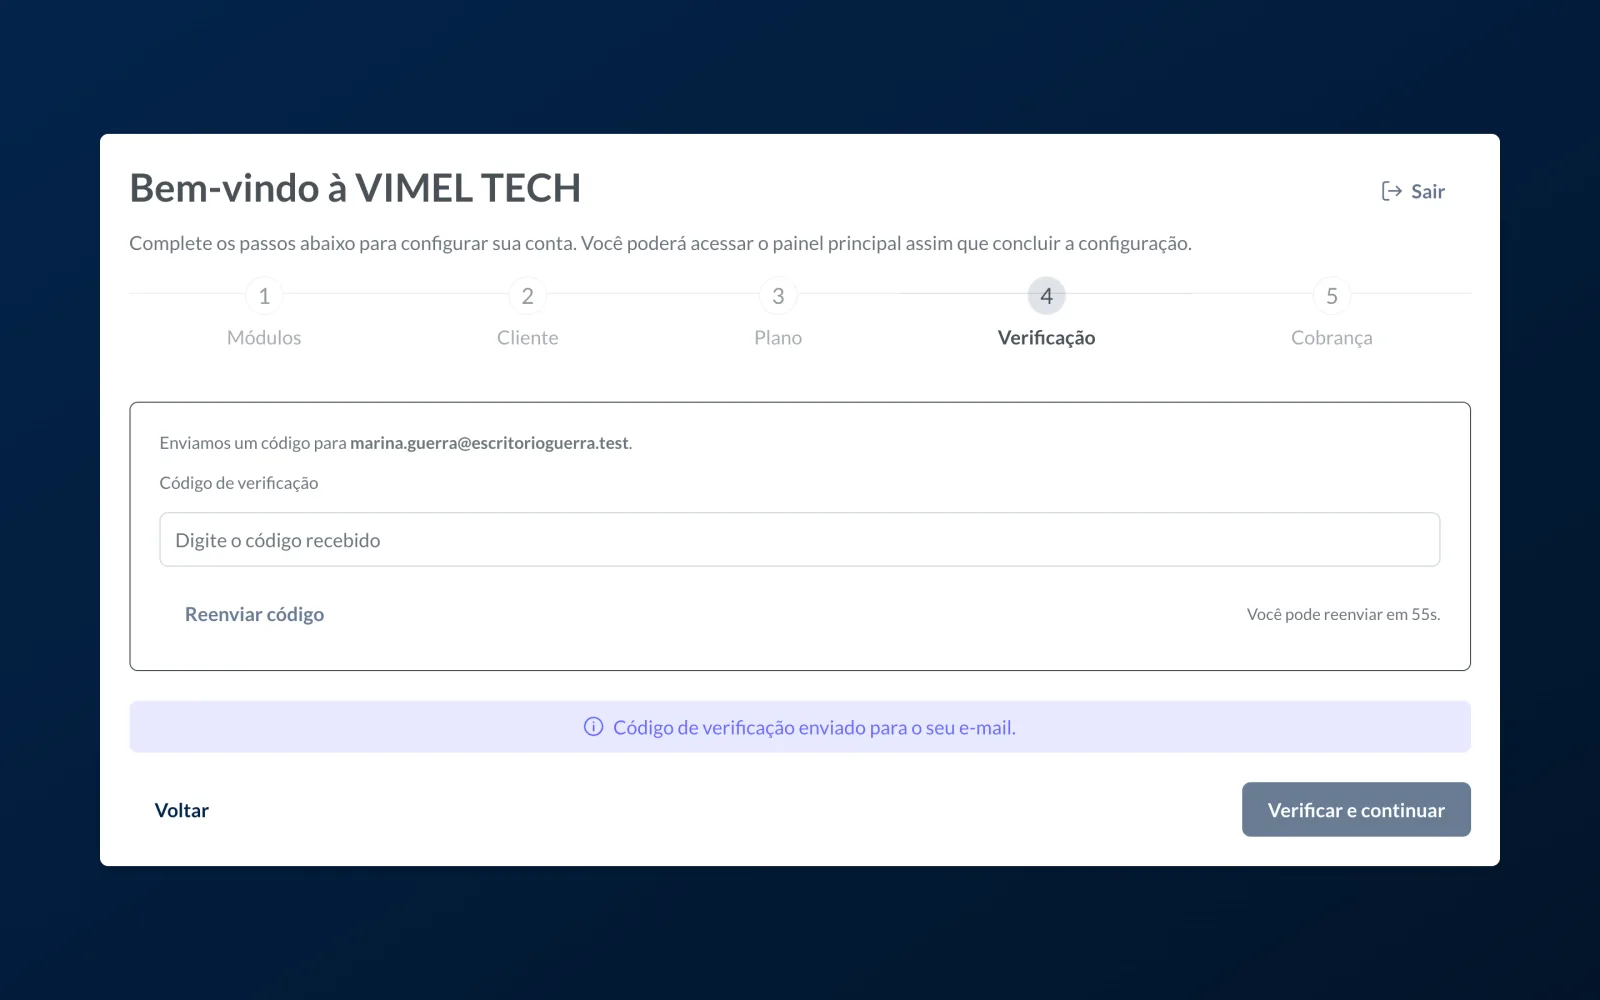
Vimel sends a code to the sign-up e-mail and the screen repeats the address it went to — check there for a typo before going looking for a lost e-mail.
There is a resend button with a countdown: while the countdown runs, resending is unavailable.
Step 5 — Billing (Cobrança)
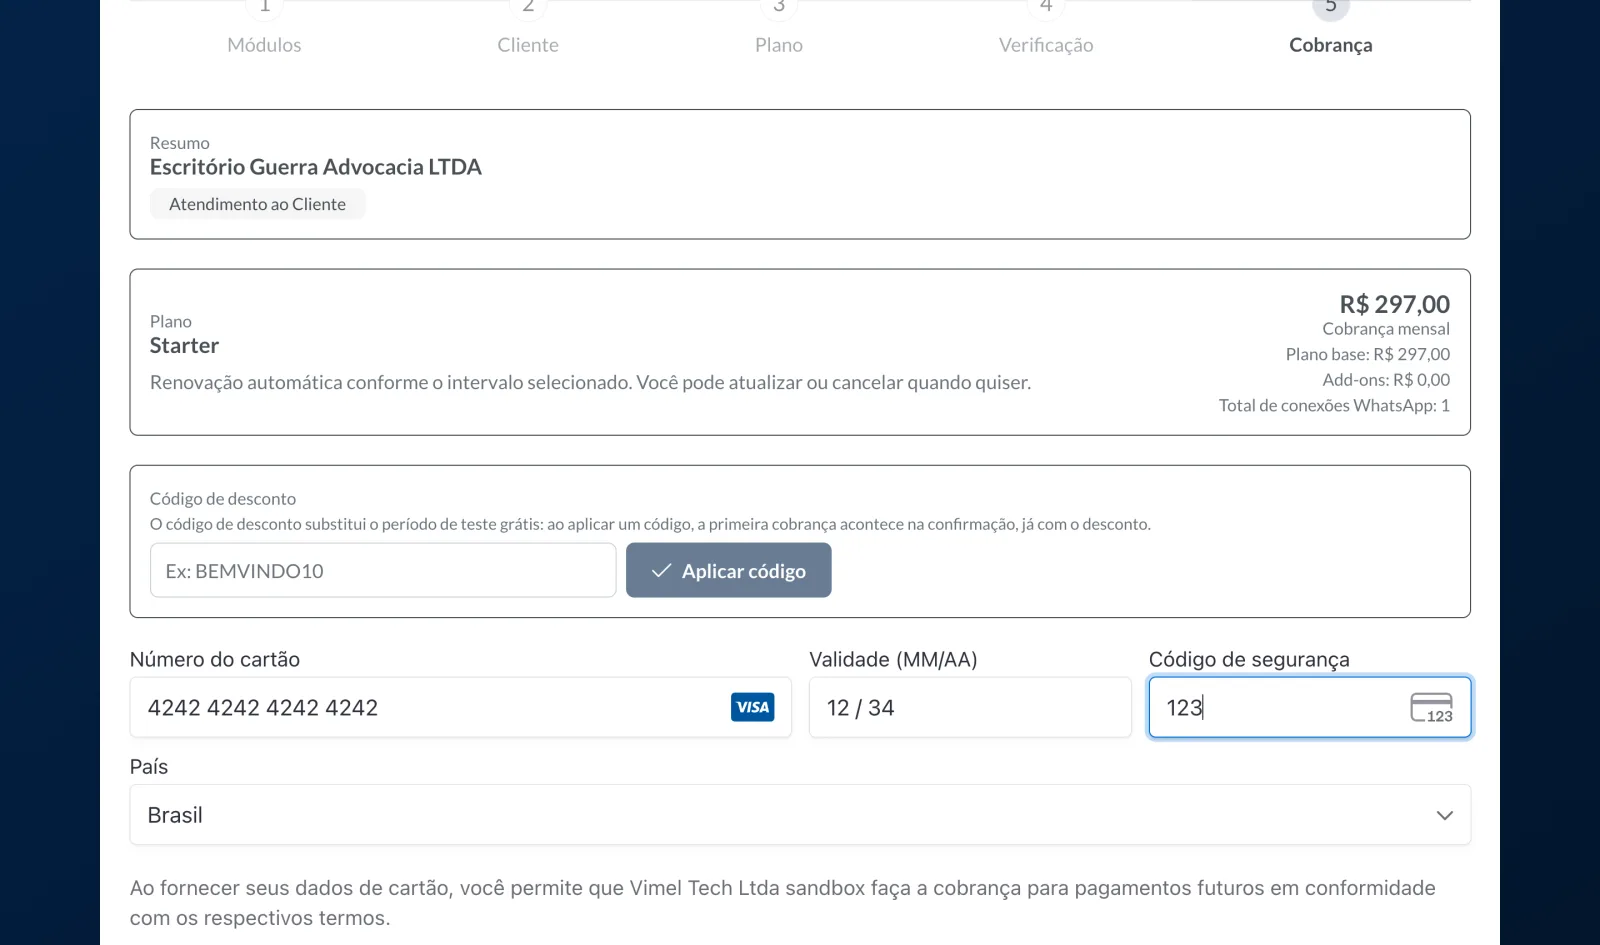
The last step brings it all together: the summary shows the client and the chosen modules, and the plan block splits the amount into base plan and add-ons, with the total WhatsApp connections included.
The discount code carries an explicit trade, and the screen says so: applying a code replaces the free trial, and the first charge happens on confirmation, already discounted. So it is a discount or a free trial, never both. If you want to try before paying, do not apply a code here.
Then come the card fields — number, expiry, security code and country — and the button that confirms the payment method.
What happens on confirmation
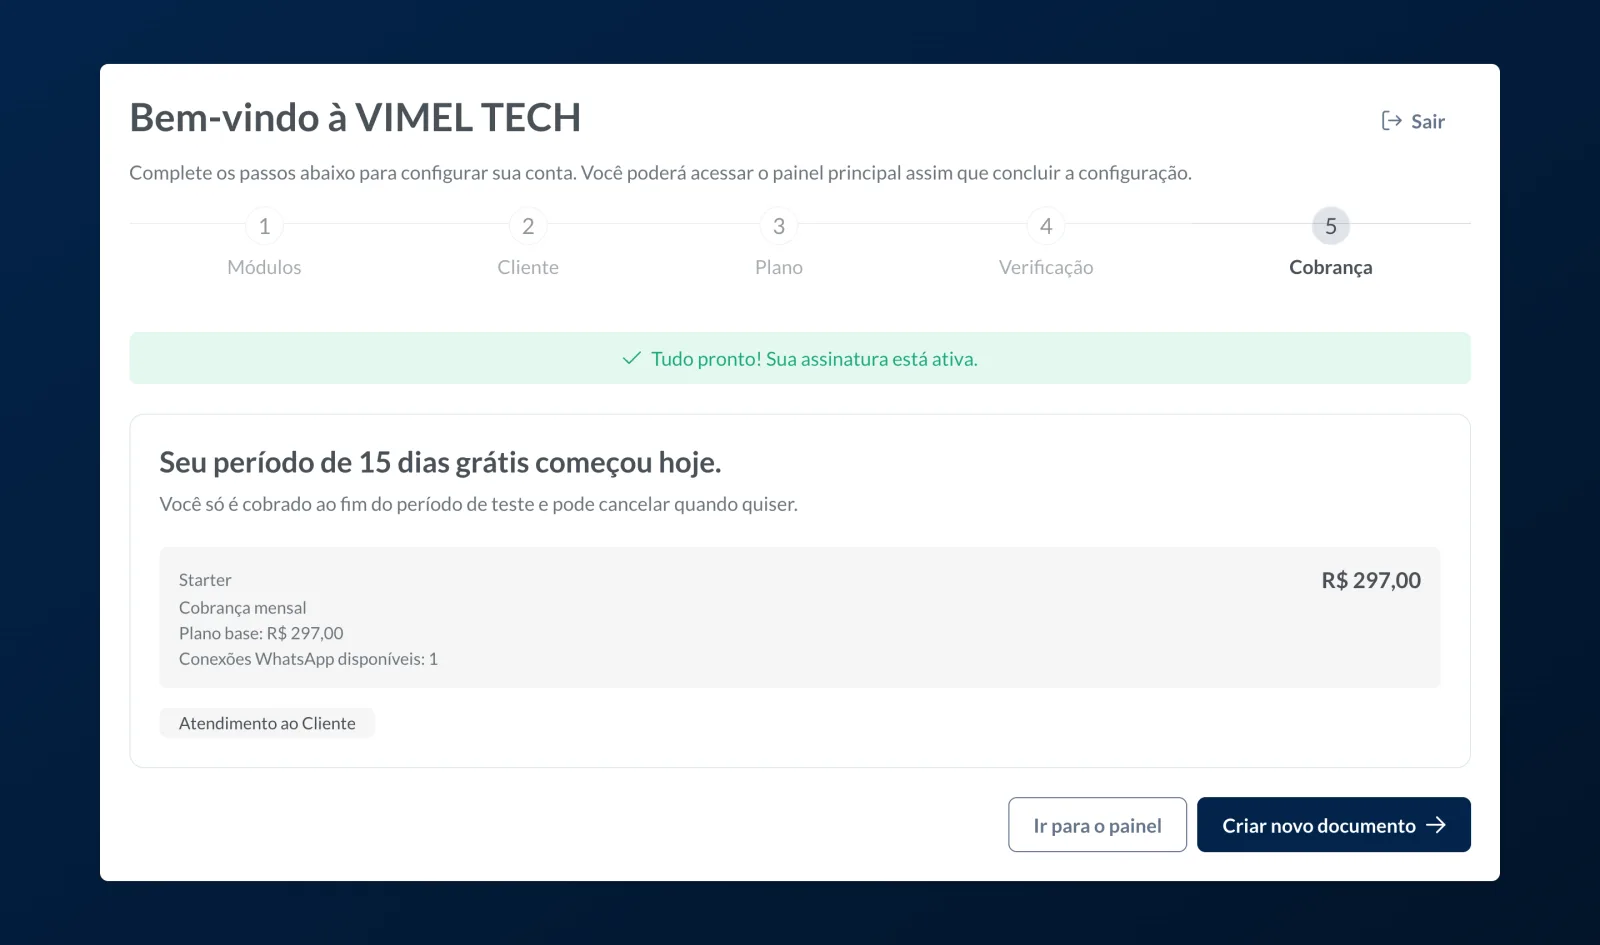
Confirmation says the subscription is active and that the trial period started that day. The charge only happens at the end of the trial, and cancelling stays available throughout it.
From here the account exists. The two paths offered lead to the dashboard or straight into creating the first piece of work.
After setup: first steps on the dashboard
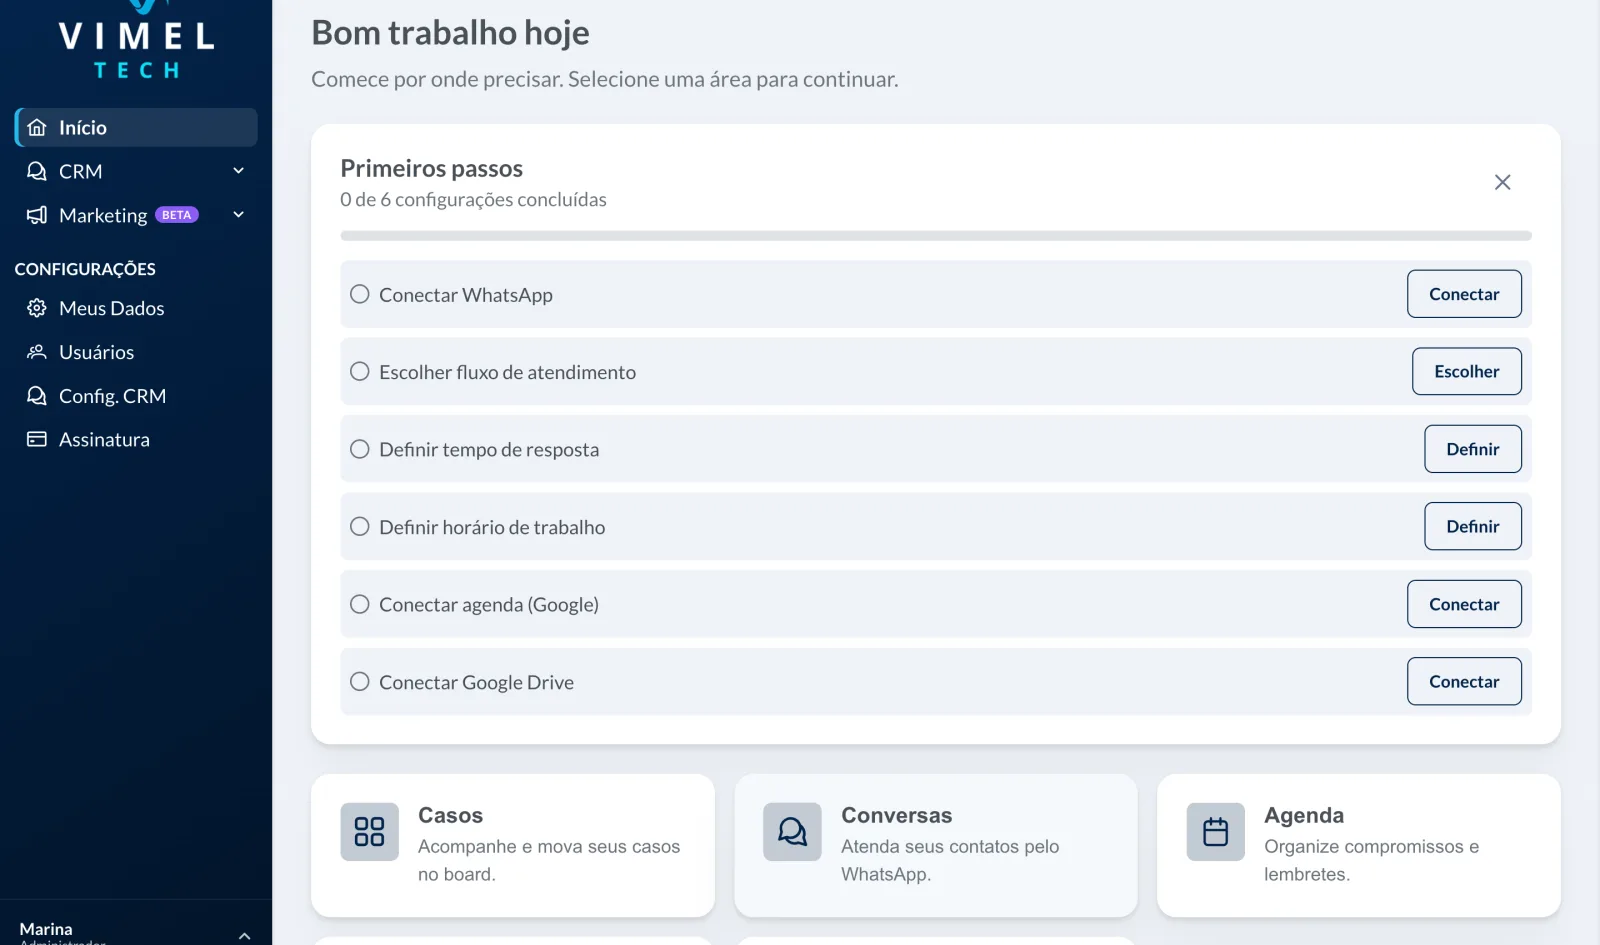
The dashboard opens with a Primeiros passos (First steps) block counting how many settings are already done. It exists because an active subscription is not yet a working operation: WhatsApp still has to be connected and the service behaviour still has to be described.
The settings listed are:
- connect WhatsApp;
- choose the service flow;
- set the response time;
- set the working hours;
- connect the Google calendar;
- connect Google Drive.
None of them is required for the dashboard to open, but connecting WhatsApp is the one that unlocks the rest: with no channel connected there are no conversations coming in, and the other settings have nothing to act on.